Creating Virtual Machines with Microsoft Virtual PC 2007
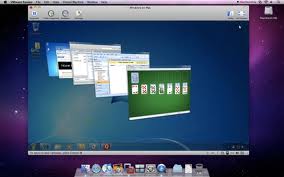 Microsoft Virtual PC is one of the top contenders in a growing line
of Virtual Machine utilities. The latest version, called Microsoft
Virtual PC 2007, allows users to conveniently run multiple operating
systems on a single computer. Users can switch operating systems as
easily as they switch applications instantly, with a mouse click.
Because each virtual machine acts like a standalone computer, each VM
can has its own sound card, video, hard disk(s), network card(s) and its
own processor.
Microsoft Virtual PC is one of the top contenders in a growing line
of Virtual Machine utilities. The latest version, called Microsoft
Virtual PC 2007, allows users to conveniently run multiple operating
systems on a single computer. Users can switch operating systems as
easily as they switch applications instantly, with a mouse click.
Because each virtual machine acts like a standalone computer, each VM
can has its own sound card, video, hard disk(s), network card(s) and its
own processor.
Monitoring Both Physical & Virtual Servers from One Console  Are
you able to identify precisely which processes are sucking up resources
and slowing down your servers? Can you do this equally well over VM
guests that VMotion?
Are
you able to identify precisely which processes are sucking up resources
and slowing down your servers? Can you do this equally well over VM
guests that VMotion?
OpManager also allows admins to remotely shut down problem-causing processes. With over 500 built-in monitors & 70 deep VMware metrics reported on, OpManager is one of the most comprehensive fault & performance management solutions available today for entire server infrastructure - both physical and virtual.
Start monitoring VMs in minutes! Download 30-day trial here »
You can download Microsoft Virtual PC 2007 for free from the following link: Download details - Virtual PC 2007
Note that besides Virtual PC, Microsoft also offers a more robust product called Virtual Server 2005 R2. We will deal with that product in a later article. The main purpose of Virtual PC is to allow the user to run multiple guest machines on one real host machine. So in that case, let's prepare to create a new virtual machine.
Virtual PC hardware considerations

Creating a virtual machine in Microsoft Virtual PC
After figuring out how much system resources you need on your computer and how many to allocate to the gust machine you will now create the VM.- Open Virtual PC and click on New
- In the New Virtual Machine Wizard click Create a Virtual Machine.
- In the Virtual Machine Name and Location click to browse to point to the location where you want to place your new VM. Note that the best location for the VM is on a separate disk and NOT on the same physical disk as your host operating system. If you do not have a separate hard disk in your computer you might consider using a USB 2.0 external hard disk.
- In the Operating System window select your required guest operating system. Note the large list of Microsoft-based operating systems. If you plan to install a non-Microsoft OS then choose "Other".
- In the Memory window note that Virtual PC tries its best to determine the recommended amount of RAM to allocate to the new guest VM based upon your selection in the previous step. You can manually change that setting.
- In the Virtual Hard Disk Options window click to select A New Virtual Hard Disk. If you've already created the hard disk in a different manner (read my "Creating Differencing Disks with Microsoft Virtual PC" article for more info), then select An Existing Hard Disk.
- In the Virtual Hard Disk Location window browse to the location of the new hard disk, and give it a proper name. Try to be as specific as possible and try to place each VM in its own folder. You need to specify the size of the new virtual hard disk. Make sure you'll have enough space on it to install whatever OS that you want, and also plan for any additional software or services. Note: Virtual PC uses dynamically expanding disks, meaning they start out as small .VHD files, but the VM itself "sees" them in their full size. As space is taken on the virtual hard disk by the VM, the size of the .VHD file increases.
- When you're done click Finish. Your new VM is ready to boot.
Now continue to my "Installing a new OS on a new VM with Microsoft Virtual PC" article in order to learn how to install the required operating system on your new guest VM.
www.microsoft.com/virtual-pc/support.aspx
Note: All screenshots and procedures are based on the RC version of Windows Virtual PC.
Microsoft Virtual PC for Windows 7 allows users to conveniently run multiple operating systems on a single computer. Users can switch operating systems as easily as they switch applications instantly, with a mouse click. Because each virtual machine acts like a standalone computer, each VM can has its own sound card, video, hard disk(s), network card(s) and its own processor. Since each VM runs its own operating system, users can install and run most x86 operating systems.
Note: The fact that the new version of Virtual PC can still only run x86 guest VMs is a pitty. This means that only 32-bit guest operating systems can be used, and this, in turn, means that you will not be able to use it to host a Windows Server 2008 R2 VM, or even Windows Server 2008 64-bit VMs running Exchange Server 2007 or 2010. This is bad, becasue the only free alternative for running such operating systems on your host machine is Sun Virtual Box, and if you don't care about paying a few bucks, I strongly recommend VMware Workstation, which is not free, but is far more superior in it's capabilities than Virtual PC.
Supported guest operating systems by Microsoft are ONLY 32-bit versions of Windows 7, Windows Vista and Windows XP.
So, how do you create a new Virtual machine? How do you configure it, and how do you make changes to it afterwards?
Read on.
To create a new VM, click on Start, then browse to Windows Virtual PC program group. Next click on Windows Virtual PC.

BTW, you can directly open this folder location: C:\Users\username\Virtual Machines.
The default VM location is opened.

In the above screenshot, I already have the default Windows XP Mode VM in place. We will now create a new VM. Press on the Create Virtual Machine button.
Type in the VMs name, and either browse to, or type a folder location. This is where the VHD files will be stored, so make sure you've got plenty of space on the partition that has the folder on. Press Next.

Next, enter the amount of memory that you wish to allocate to the VM. The more memory, the better performance you'll get from the VM. However, remember that this amount is limited by the amount of physical memory you've got on the host machine. Also, some guest operating systems will benefit more from additional memory, while others won't. Generally speaking, an XP guest VM will be just fine with 256 to 512 MB of RAM, while a Windows Vista or Windows 7 guest VM will probably require at least 1024 MB of memory.
You can then chose if you want to connect the VM to the host's physical network, or not. Note that these settings can be changed later, but only when the VM is not running.
Press Next.

Next, you will need to select the virtual disk options. The default is to create a dynamically expanding disk, but there are other options available. You can also click to select "Enable Undo Disks", which will allow you to revert to a saved state of the VM whenever you shut it down.
Note that these settings can be changed later, but only when the VM is not running.
Creating a Virtual Machine in Virtual PC on Windows 7
In on previous article ("Install Virtual PC on Windows 7") I walked you through the features of the new Windows Virtual PC software that is specially designed for Windows 7. While you can utilize it to boot the default and pre-configured Windows XP virtual machine that can be downloaded from Microsoft's website (see my article on how to install Windows XP Mode on Windows 7), Virtual PC can also be used to create, configure and boot your own set of virtual machines.
Track Down Bandwidth Hogs Today Track
down your network bandwidth hogs with SolarWinds NetFlow Traffic
Analyzer (NTA) by identifying which users, applications and protocols
are consuming the most bandwidth. NTA monitors network traffic by
capturing flow data from network devices, including Cisco® NetFlow v5 or
v9, Juniper® J-Flow, IPFIX, sFlow®, and Huawei NetStream™.
Track
down your network bandwidth hogs with SolarWinds NetFlow Traffic
Analyzer (NTA) by identifying which users, applications and protocols
are consuming the most bandwidth. NTA monitors network traffic by
capturing flow data from network devices, including Cisco® NetFlow v5 or
v9, Juniper® J-Flow, IPFIX, sFlow®, and Huawei NetStream™.
Download a full-functional, 30-day trial and in less than an hour, you can fire up network bandwidth monitoring and start getting a comprehensive view of your network traffic and the location of bottlenecks.
Learn More or Download a FREE, Fully-Functional 30-day Trial
Important: To run Windows Virtual PC (and with it,
XPM), your computer has to have the Intel VT or AMD-V features enabled
in the BIOS. To find out if your PC is virtualization capable, please
visit the Windows Virtual PC support page: Track
down your network bandwidth hogs with SolarWinds NetFlow Traffic
Analyzer (NTA) by identifying which users, applications and protocols
are consuming the most bandwidth. NTA monitors network traffic by
capturing flow data from network devices, including Cisco® NetFlow v5 or
v9, Juniper® J-Flow, IPFIX, sFlow®, and Huawei NetStream™. Download a full-functional, 30-day trial and in less than an hour, you can fire up network bandwidth monitoring and start getting a comprehensive view of your network traffic and the location of bottlenecks.
Learn More or Download a FREE, Fully-Functional 30-day Trial
www.microsoft.com/virtual-pc/support.aspx
Note: All screenshots and procedures are based on the RC version of Windows Virtual PC.
Microsoft Virtual PC for Windows 7 allows users to conveniently run multiple operating systems on a single computer. Users can switch operating systems as easily as they switch applications instantly, with a mouse click. Because each virtual machine acts like a standalone computer, each VM can has its own sound card, video, hard disk(s), network card(s) and its own processor. Since each VM runs its own operating system, users can install and run most x86 operating systems.
Note: The fact that the new version of Virtual PC can still only run x86 guest VMs is a pitty. This means that only 32-bit guest operating systems can be used, and this, in turn, means that you will not be able to use it to host a Windows Server 2008 R2 VM, or even Windows Server 2008 64-bit VMs running Exchange Server 2007 or 2010. This is bad, becasue the only free alternative for running such operating systems on your host machine is Sun Virtual Box, and if you don't care about paying a few bucks, I strongly recommend VMware Workstation, which is not free, but is far more superior in it's capabilities than Virtual PC.
Supported guest operating systems by Microsoft are ONLY 32-bit versions of Windows 7, Windows Vista and Windows XP.
So, how do you create a new Virtual machine? How do you configure it, and how do you make changes to it afterwards?
Read on.
To create a new VM, click on Start, then browse to Windows Virtual PC program group. Next click on Windows Virtual PC.

BTW, you can directly open this folder location: C:\Users\username\Virtual Machines.
The default VM location is opened.

In the above screenshot, I already have the default Windows XP Mode VM in place. We will now create a new VM. Press on the Create Virtual Machine button.
Type in the VMs name, and either browse to, or type a folder location. This is where the VHD files will be stored, so make sure you've got plenty of space on the partition that has the folder on. Press Next.

Next, enter the amount of memory that you wish to allocate to the VM. The more memory, the better performance you'll get from the VM. However, remember that this amount is limited by the amount of physical memory you've got on the host machine. Also, some guest operating systems will benefit more from additional memory, while others won't. Generally speaking, an XP guest VM will be just fine with 256 to 512 MB of RAM, while a Windows Vista or Windows 7 guest VM will probably require at least 1024 MB of memory.
You can then chose if you want to connect the VM to the host's physical network, or not. Note that these settings can be changed later, but only when the VM is not running.
Press Next.

Next, you will need to select the virtual disk options. The default is to create a dynamically expanding disk, but there are other options available. You can also click to select "Enable Undo Disks", which will allow you to revert to a saved state of the VM whenever you shut it down.
Note that these settings can be changed later, but only when the VM is not running.


0 comments: